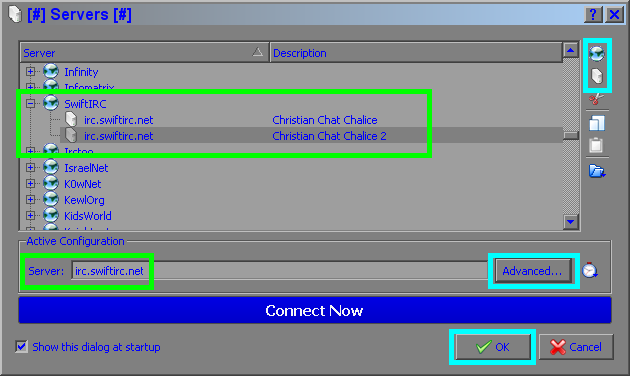
4.0 KVIrc Identify & Server Settings

Step 16: Have
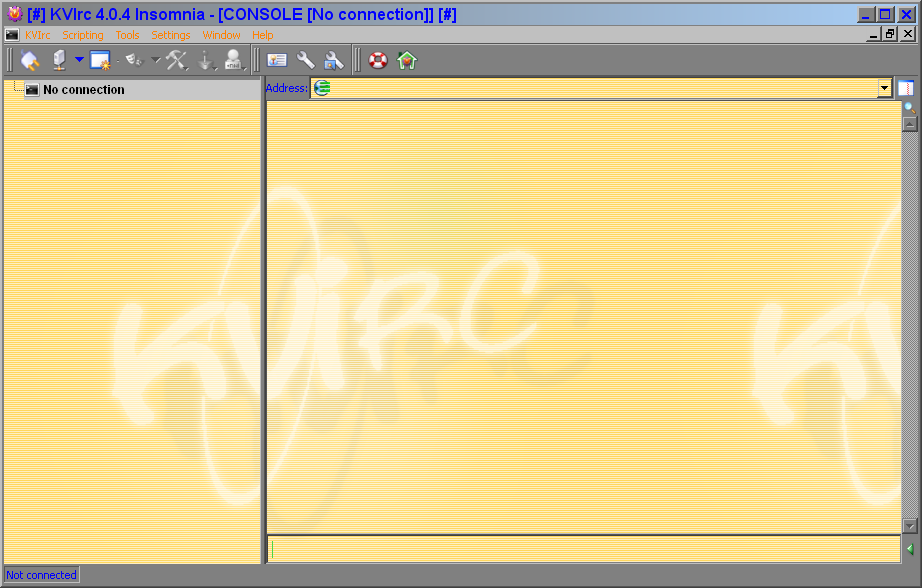
a short Look at the start up screen. KVIrc has very
good explanations to editable fields just move your mouse pointer
over a blank or a box and a small pop up appears with a
lot remarks (if available). Also
the build in Help docs can be help full (push F1), but i
recommend to proofread this tutorial first once.
One subject in advance, the
connection attempts after click the plug icon  on the top left corner of the main
screen.
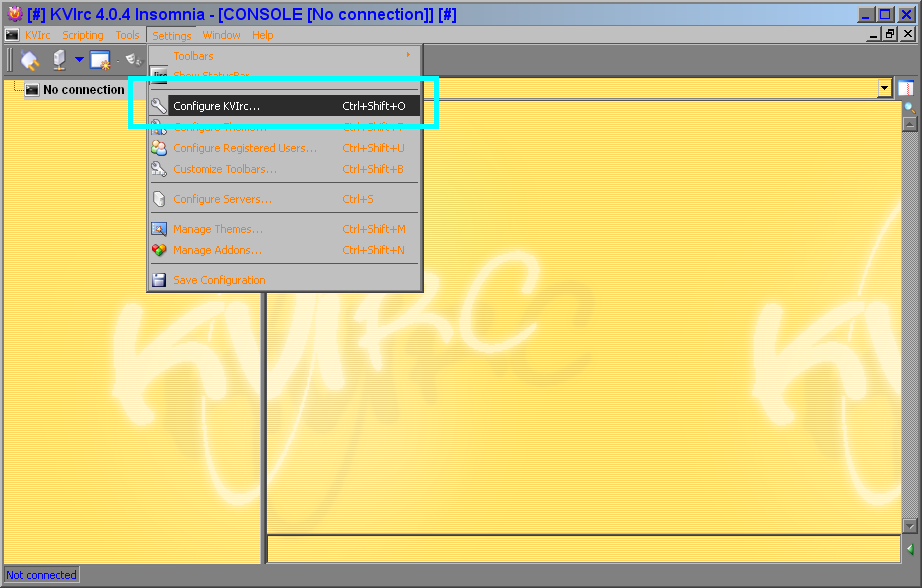
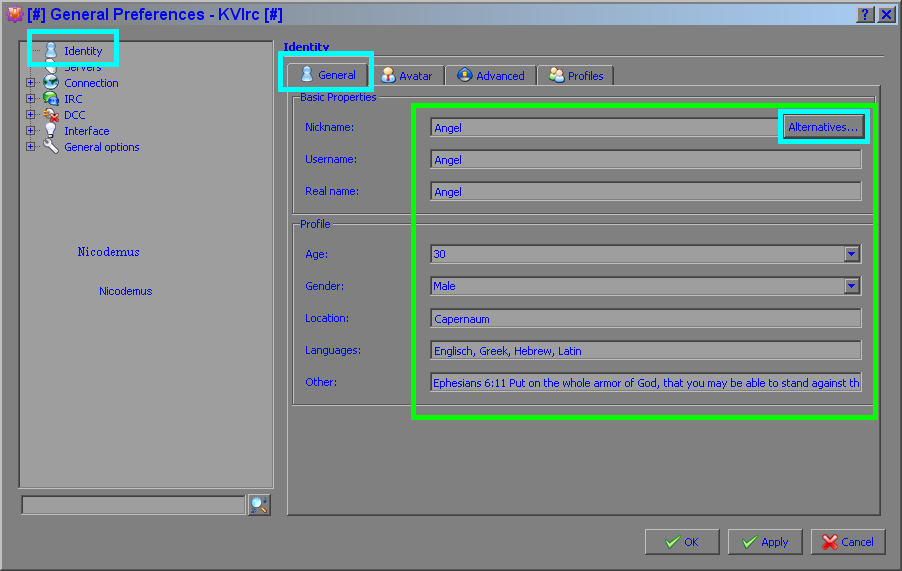
Step 17: Click through Settings > Configure KVIrc... or press Ctrl+Shift+O
Step 18: Identity paperwork, make your signature and click at Alternatives.
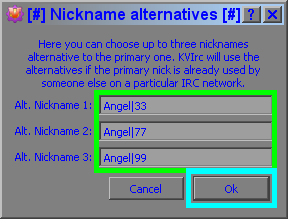
Step 20: If you like to use a Avatar check the box > use avatar and click Choose.
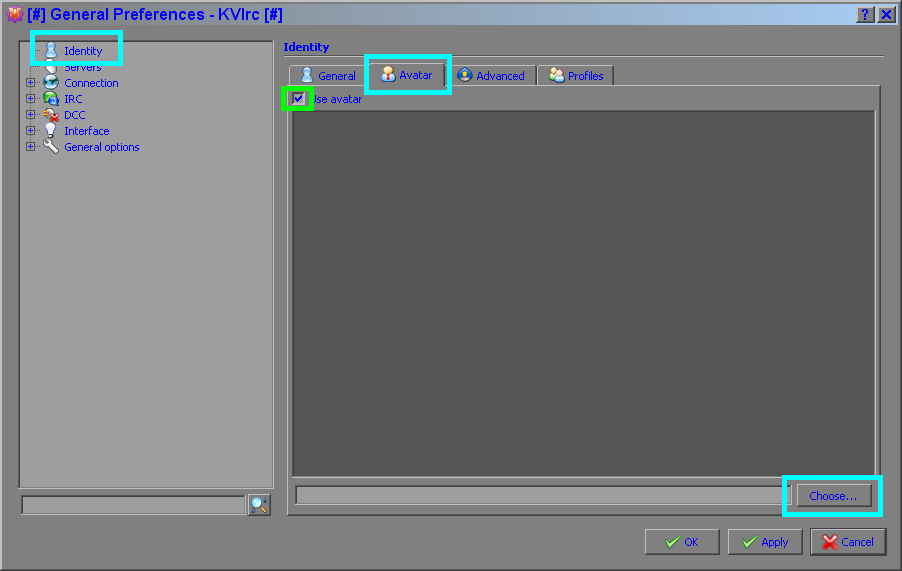
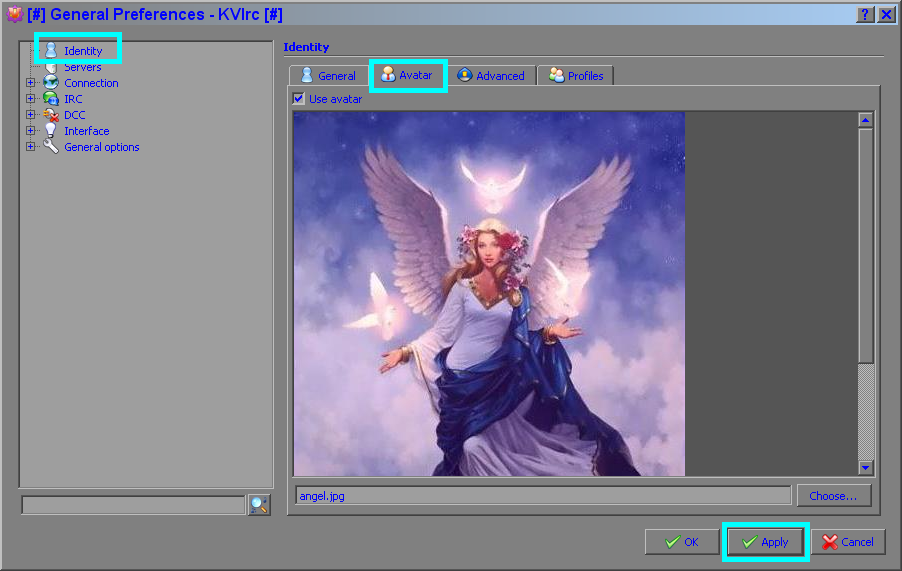
Step 21: Browse for your picture location and hit OK!
(supported image formats are png, jpg, bmp, gif and xpm)

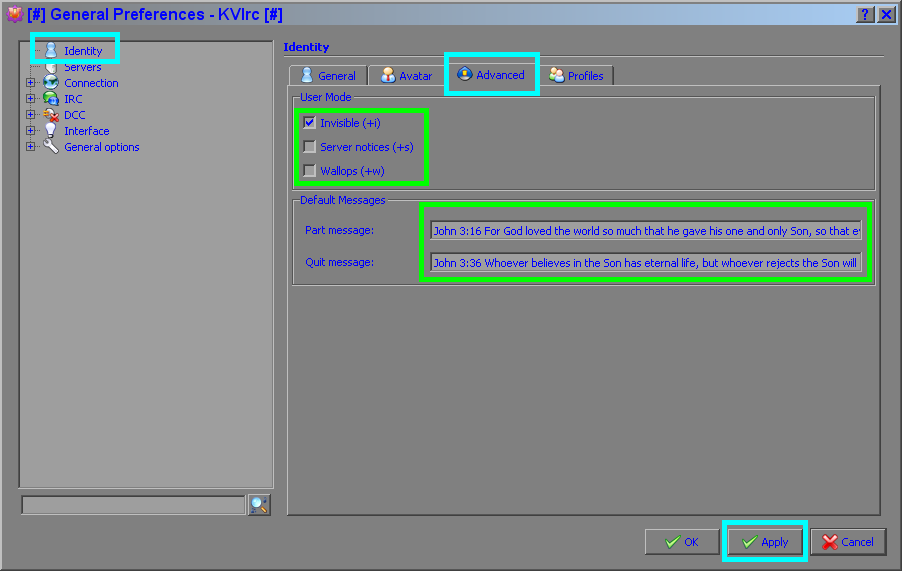
Step 23: Here some mixed things, couple user modes and left messages:
1. [x] Invisible (+i) mode allows a nick to hide from a /WHO or a /NAMES command. It also moves the nick from the visible users count to the invisible users count in the /LUSERScommand. You can still be found if the user knows your nick.
2. [x] The Server notices (+s) mode allows a user to receive non-specific messages from the server.
3. [x] WallOps (+w) mode allows an operator to receive WallOps messages from other operators. This is not used much on IPocalypse, mainly because it is an unsecured communication medium. WallOps are like ChatOps except that normal users who are +w can view them.
Check the box [x] you may require. You can check all commands used here "@ Click"
One thing is open here, enter your full quit or part message instead of "You have left the room." or "Disconnected from Server."
Click Apply.
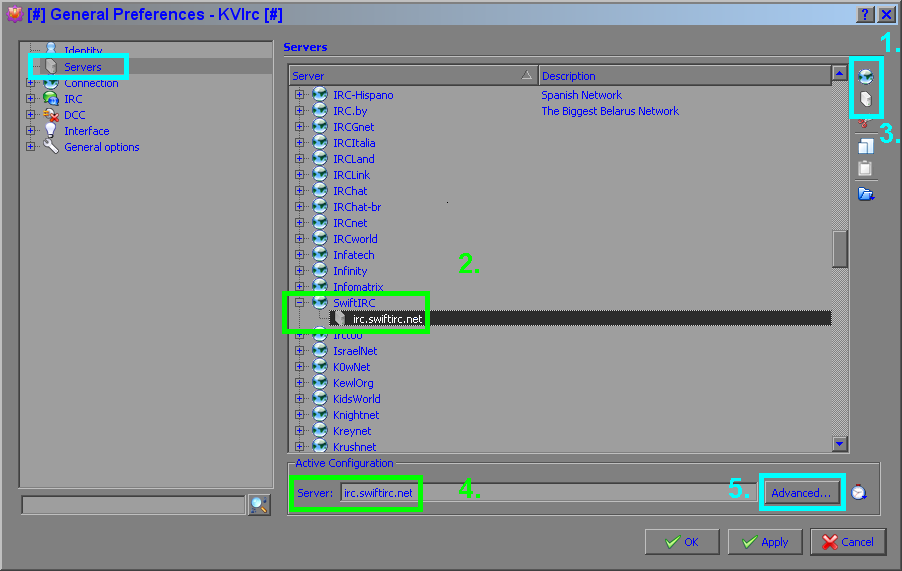
Step 25: This is the Identity tab, first give it a description on top anything you like for example: CCC. The Identity tab is only used for this server (IPocalypse Network subcategory) and channels do you visit at this server. Configure it for automatically comfortable surf capabilities, it is a nice build in feature of KVIrc.
Made your paperwork and set a specified user mode like in step 25, or use the default mode (preset in step 25). If you have a registered nick you can enter the password here. The benefits of a registered nick are:
- Ability to prevent others from using your nickname.
- Ability to recover your nick if you're disconnected but your "ghost" is still online with your nick.
- Once you have a registered nickname, you can register a channel with ChanServ or send/receive memos via MemoServ.
How
to register a nick is explained later in another guide, you may return
here and set a password when all is said and done. The nickname
registration process is painless and only takes a minute, so I
encourage you all to do so. When all done at this tab, move
to the Connection tab!
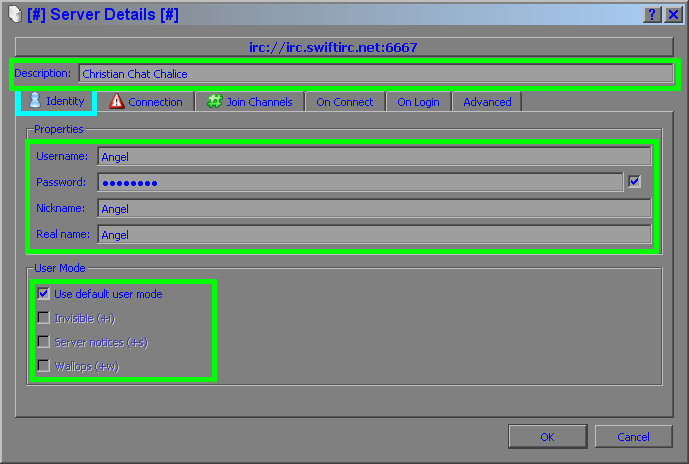
Step 26: For the Connections needs a bit management by perception. The port used to connect is set to 6667, this is the main port normally used all over the world to accept connections on most IRC servers. This connection is usually unsecured and unciphered. if you want a secure connection to a server you have to check the box > use SSL protocol, but when you do, the port used to connect have to change to the specified one, quoted by the server owner or network administrator at there homepages. The port for SSL is ordinarily 7000 or displayed after a successful log in at the welcome screen on the server.
But IPocalypse does not have this one in use! Leave it well enough alone at 6667!
But don't
worry there other things for chat secure, just continue follow this
guide!
What is a Port?
To the uninitiated or the otherwise-gifted computer user, technical geek-speak can be rather frustrating and aggravating. When instructions are filled with such things as "port," "TCP," "UDP," and other acronyms or technical terminology, the user feels more isolated and rarely finds a solution or comprehension. Fortunately, comprehension is just moments away. A computer port is a type of electronic, software- or programming-related docking point through which information flows from a program on your computer or to your computer from the Internet or another computer in a network. (A network, by the way, is a series of computers that are physically or electronically linked.)
The next thing is the server ip, the IPocalypse network has more then 1 server you can connect to usually don't have to enter here anything, I recommend to leave it at 0.0.0.0 then the server is chosen freely by the interaction of the transmission. But if you know how to use it straight, here are some IPocalypse IP's:
95.211.15.173
206.41.117.176
212.7.198.230
64.85.163.118
What is an IP Address?
No doubt you've heard the term "IP address." Unless you're a techie, though, you may not have more than a shadowy notion of what an IP address actually is or how it works. Let's explore the concept. An IP address ("IP" stands for Internet Protocol) is a fascinating product of modern computer technology designed to allow one computer (or other digital device) to communicate with another via the Internet. IP addresses allow the location of literally billions of digital devices that are connected to the Internet to be pinpointed and differentiated from other devices. In the same sense that someone needs your mailing address to send you a letter, a remote computer needs your IP address to communicate with your computer.
OK
continue with the rest, check the box [x] Cache IP address, this help
to made the connection a bit faster because the DNS address resolution process
is not accomplished, always made a connection to a server. If you
like the client connect automatically to this server check the box [x]
Connect to the server at Start up (is a very comfortable feature and i
recommend to use it). The Protocol Encoding and Text Encoding is perfectly preconfigured, thus
leave like it is. The
last thing at this tab is the Proxy Server menu it is a very tricky
thing to surf incognito . But it don't works on IPocalypse
because most proxys and ports are already blacklisted
 . When you like to try out a proxy,
I take you up on later at this guide on part 4 step 33 (mark the green 1). Well done move on to the Join Channels tab!
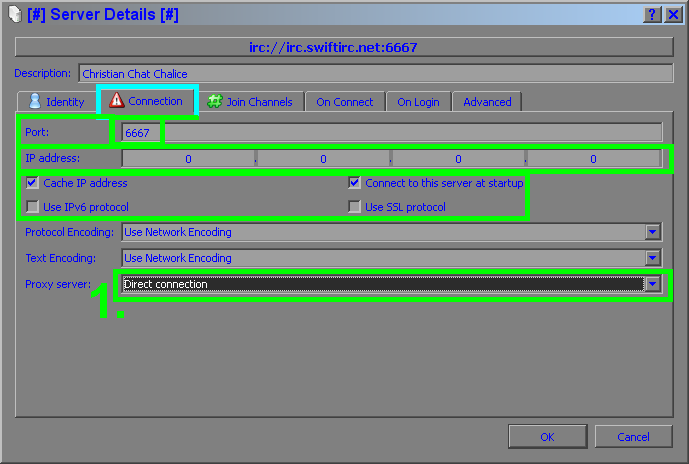
Step 27: The join Channels tab is pretty easy to master. Just move your mouse pointer down to the left blank, type the channel names you like to visit and push Add. Here are two available entry's:
ChristianChatCafe
ChristianChatCafe-Youth
Look like in my picture (when you check the box [x] Connect to the server at Start up in step 28 you join automatically to this chat rooms too!). This tab is only for channels without require a password (key). To join channels required a password, move to the On Login tab. (skip the On Connect tab)
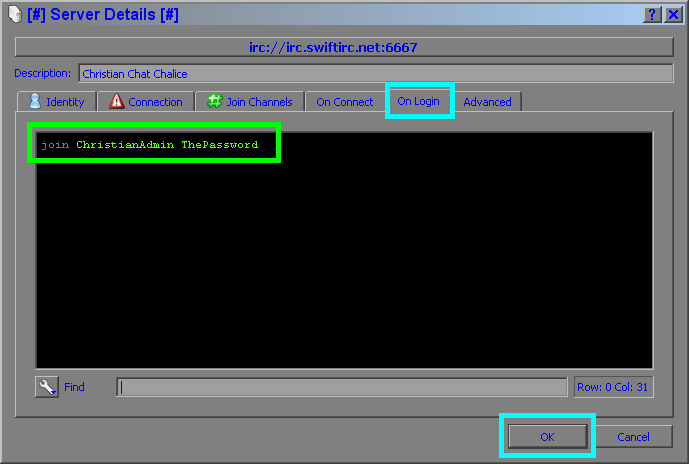
Step 28: Alright at the On Log in tab click once into the black field to activate the courser and type the command the channel name and the password required, like:
join ChristianMetro Password
(Command) (Channel Name) (The Password)
Look at the picture example! And click OK!
 .
.
